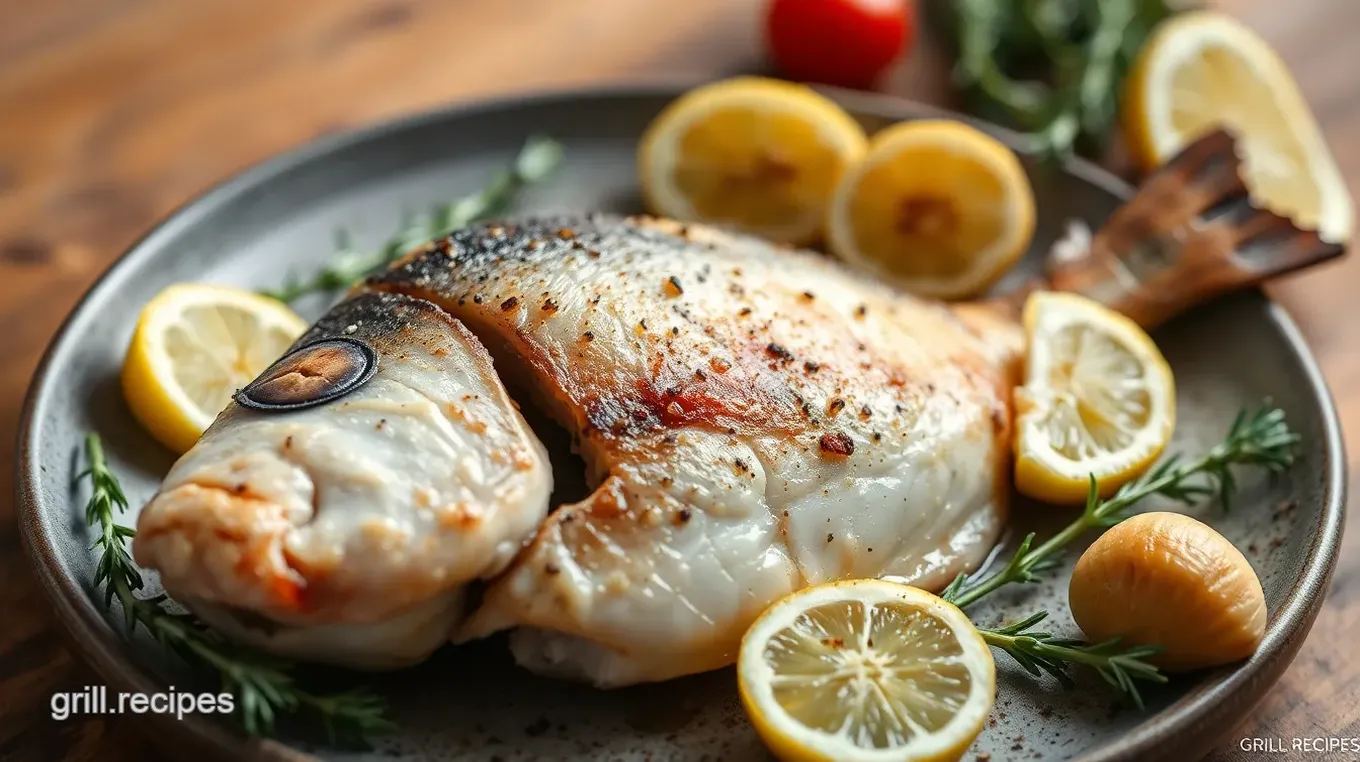
Oven-Baked Yellowtail with Garlic & Thyme
Oven-Baked Yellowtail: 40 minutes prep and cook time. A delightful seafood dish featuring yellowtail, garlic, thyme for a healthy meal. Serves 6.

- About Introduction
- Secrets Behind Perfect Oven-Baked Yellowtail with Garlic and Thyme
- The Magic Behind This Recipe
- Health & Nutrition Highlights
- Recipe at a Glance
- Essential Components Guide
- Kitchen Equipment Essentials
- Pro Ingredient Tips
- Perfect Cooking Technique
- Success Guaranteed Tips
- Perfect Presentation
- Storage & Make-Ahead
- Creative Variations
- Expert FAQ Solutions
- Complete Nutrition Guide
- Recipe Card
About Introduction
Oven-Baked Yellowtail with Garlic and Thyme is a delightful dish that showcases the rich culinary traditions of coastal cuisine. Historically, yellowtail has been a favored fish in various cultures, particularly in Japan and the Mediterranean regions, where its delicate flavor and firm texture make it a...
Secrets Behind Perfect Oven-Baked Yellowtail with Garlic and Thyme
The secrets behind perfecting Oven-Baked Yellowtail lie within its rich culinary heritage. Originating from fishing communities around the world, yellowtail has long been celebrated for its versatility in cooking methods—from grilling to baking. This fascinating origin story includes tales of fishermen who relied on sustainable practices to catch this prized fish while respecting marine ecosystems.
Culturally significant across various cuisines, yellowtail is often associated with festivities and communal dining experiences. Its modern-day popularity continues to grow as consumers become more conscious about sourcing sustainable seafood options. Served in homes or upscale restaurants alike, this dish has transcended cultural boundaries while maintaining its essence.
The Magic Behind This Recipe
What makes Oven-Baked Yellowtail so magical are the unique flavor combinations created by garlic, thyme, lemon pepper, and butter—the perfect harmony of savory notes that tantalize your taste buds. These foolproof techniques ensure even novice cooks can achieve restaurant-quality results at home.
This expert-tested method focuses on maximizing flavors through simple yet effective steps—such as marinating fish before cooking—to enhance overall taste without requiring extensive culinary skills. Additionally, time-saving tips like prepping vegetables ahead or using pre-mixed spices streamline your cooking process without sacrificing quality.
Health & Nutrition Highlights
Oven-Baked Yellowtail offers remarkable nutritional benefits worth noting! Packed with high-quality protein and omega-3 fatty acids essential for heart health, this dish aligns perfectly with wellness-conscious diets. Moreover, garlic adds potential immune-boosting properties while fresh thyme provides anti-inflammatory benefits—making every bite not only delicious but also nourishing.
Dietary considerations are easily met since yellowtail is naturally low in calories yet high in nutrients; thus catering to those following balanced nutrition plans or looking for lighter meal options without compromising flavor satisfaction.
Recipe at a Glance
When considering preparing Oven-Baked Yellowtail with Garlic and Thyme:
- Total Preparation Time: 40 minutes
- Skill Level Required: Beginner-friendly
- Serving Size Details: Serves 6 people
- Cost Efficiency: Affordable ingredients make it budget-friendly
In summary, this exquisite recipe allows you to enjoy all the aspects of flavorful dining experience while being mindful about health—and your wallet! Whether it's a weekday family dinner or an elegant gathering with friends; Oven-Baked Yellowtail delivers both satisfaction on every level!

Essential Components Guide
Premium Core Ingredients
When preparing your oven-baked yellowtail, the quality of your core ingredients can significantly affect the dish's overall flavor and presentation.
-
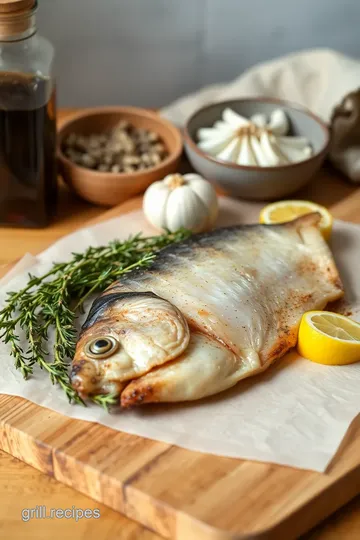
Yellowtail: Aim for 6 pieces of fresh yellowtail, each weighing around 150-200 grams. Look for fillets that have bright, shiny skin without any discoloration or browning. Fresh fish should have a light, ocean-like smell rather than a strong fishy scent.
-
Garlic: You will need both sliced (5 cloves) and minced garlic (5 cloves). Choose firm and plump garlic bulbs with tight skins. Avoid any that appear sprouted or soft to ensure maximum flavor.
-
Butter: Totaling 100 grams, select unsalted butter to allow better control over seasoning. For an extra creamy texture, look for high-fat content butter (at least 80% fat).
Quality Indicators:
Freshness is key; avoid any ingredients that show signs of spoilage like brown spots or off smells.
Selection Tips:
Buy from trusted sources such as local fish markets or grocery stores known for their fresh seafood selection.
Storage Guidance:
Store the yellowtail in the coldest part of your refrigerator if using within two days; otherwise, freeze it wrapped tightly in plastic wrap.
Signature Seasoning Blend
A well-crafted seasoning blend elevates baked yellowtail from simple to sensational.
-
Fish Spice Mix: Combine 4 teaspoons of Robertson's spice for fish with lemon pepper to create a vibrant base flavor. This mix enhances the natural taste while adding depth.
-
Salt: Use kosher salt to season according to personal preference—start lightly and adjust after tasting.
Spice Combinations:
Feel free to experiment by incorporating spices like paprika or cayenne pepper for added heat!
Herb Selections:
Fresh thyme stands out in this recipe; however, herbs like dill or parsley can also complement the dish beautifully.
Flavor Enhancers:
Add a splash of lemon juice before serving to brighten up all flavors present in this delectable meal.
Aromatic Additions:
Consider including sliced onions and green peppers as they not only add sweetness but also contribute lovely textures when baked alongside the fish.
Smart Substitutions
In cooking, flexibility is vital! Here are some substitutions you might consider:
-
Alternative Options: If you cannot find yellowtail locally, snapper or sea bass works well as substitutes due to their similar textures and flavors.
-
Dietary Swaps: For those who prefer healthier fats over butter, opt for olive oil instead—just keep an eye on quantities since oils tend to be more concentrated in flavor than butter.
-
Emergency Replacements: In case you're out of thyme at home during preparation time—dried oregano can fill its place effectively without compromising much on taste!
-
Seasonal Variations: Incorporate seasonal vegetables like zucchini slices during summer months when they're abundant; they roast beautifully alongside your main ingredient!
Kitchen Equipment Essentials
Having the right tools makes all difference while cooking! Here’s what you'll need:
Must-Have Tools
- A large oven-safe pan lined with tinfoil simplifies cleanup while retaining moisture throughout baking.
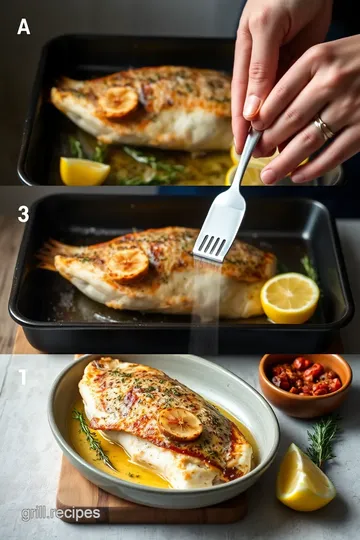
- A basting brush helps distribute melted butter evenly over each piece ensuring full flavor coverage.
- Sharp knives are essential for slicing garlic finely without bruising it—which could alter taste negatively!
Recommended Appliances
An oven capable of reaching high temperatures is indispensable because this method requires precision cooking at specific degrees Fahrenheit/Celsius settings mentioned earlier.
Helpful Gadgets
Use silicone spatulas instead of wooden ones—they’re easier on cookware surfaces & won’t scratch non-stick finishes!
Home Alternatives
In lieu of specialized kitchen gadgets: regular utensils can do just fine provided they’re clean & sharp enough!
Pro Ingredient Tips
To optimize ingredient usage further:
-
Selection Secrets : Always inspect freshness carefully before purchasing items from markets—this ensures you receive top-notch quality every time!
-
Quality Markers : Look specifically at expiration dates when buying packaged goods—it’s easy often overlooked but crucially affects food safety standards maintained throughout preparation stages involved here too!
-
Storage Solutions : Utilize airtight containers whenever possible especially after opening packages containing dry components—to prolong shelf life immensely beyond initial expectations set forth initially upon purchase itself too!
-
Money-Saving Tips : Buy ingredients in bulk where feasible especially spices which tend last longer than most perishables; sharing costs among friends/family helps make dishes even more enjoyable together along culinary adventures experienced frequently thereafter too!
Perfect Cooking Technique
Cooking is an art that requires attention to detail and a systematic approach. By following these essential preparation steps, professional cooking methods, expert techniques, and success strategies, you can achieve perfect results every time.
Essential Preparation Steps
Before starting your cooking journey, it's crucial to have everything in place. This concept is known as mise en place , which translates to “everything in its place.” Gather all ingredients and tools before beginning the recipe. Chop vegetables, measure spices, and organize utensils for easy access.
Prep Techniques: Use sharp knives for efficient chopping; this reduces the effort needed and makes cutting safer. For herbs like thyme or parsley, consider using a herb stripper for quick removal of leaves from stems.
Time Management: Allocate time wisely based on the complexity of your dish. Start with tasks that take longer (like marinating) so they are ready when you need them.
Organization Tips: Arrange your workspace neatly; keep frequently used items within reach while storing away those you won’t use immediately. A clutter-free environment helps maintain focus on the cooking process.
Professional Cooking Method
Once you're prepared, it’s time to dive into the actual cooking process. Maintain temperature control throughout by preheating your oven or stovetop as directed in recipes.
Follow these step-by-step processes:
- Preheat your oven to the specified temperature.
- Prepare pans or pots accordingly—grease them if necessary.
- Cook ingredients sequentially based on their required times—start with those needing more time first.
- Monitor food closely towards the end of cooking; use timers for precision timing.
Maintaining accurate temperatures ensures food cooks evenly without overcooking any components—a critical aspect of achieving desired textures and flavors.
Success Indicators:
- Look for visual cues such as browning on meats or crispness in vegetables.
- Use a thermometer when necessary; internal temperatures indicate doneness (e.g., 75°C/165°F for poultry).
Expert Techniques
Incorporate professional methods into your routine by mastering critical steps:
- Always taste at various stages during cooking—it helps adjust seasoning effectively.
- Use high-quality tools like digital thermometers for precise measurements—this eliminates guesswork when determining doneness.
Pay close attention to precision points such as simmering versus boiling liquids—simmering allows flavors to develop without losing moisture too quickly.
Quality Checks:
Always inspect finished dishes visually before serving: look for vibrant colors and appealing presentation styles that signify freshness and quality.
Success Strategies
Even seasoned cooks encounter issues sometimes; thus having troubleshooting tips handy proves invaluable:
- If something smells burnt or shows signs of overcooking: lower heat immediately!
- Adjust seasonings incrementally if flavors seem off balance—add salt gradually rather than all at once.
- If sauces become too thick during reduction: add small amounts of water until reaching desired consistency.
For quality assurance after completing each step, double-check final results against recipe expectations regarding texture and flavor profiles—the goal is always perfection!
Perfect Results Guide:
To achieve flawless outcomes consistently make sure you allow resting periods where applicable (such as letting meat rest post-cooking). This redistributes juices ensuring moist bites upon slicing! Add final touches like fresh herbs right before plating—they enhance both aesthetics and taste tremendously!
By applying these well-defined preparation steps along with professional methodologies enhanced through expert techniques combined with reliable strategies will lead not only toward successful meals but also elevate culinary skills overall!

Success Guaranteed Tips
Professional Insights
To achieve a perfectly baked yellowtail, ensure that your fish is fresh. Look for bright, clear eyes and firm flesh when purchasing. This guarantees not only flavor but also texture.
Expert Techniques
Marinating the yellowtail in olive oil, garlic, and lemon juice for about 30 minutes before cooking enhances its natural flavors. This simple step elevates your dish from good to extraordinary.
Kitchen Wisdom
Using a meat thermometer can be invaluable. Aim for an internal temperature of 63°C (145°F) to guarantee doneness without overcooking the fish.
Success Guarantees
Always preheat the oven thoroughly before placing your fish inside. A hot oven promotes even cooking and creates a delightful golden crust on top of your yellowtail.
Perfect Presentation
Plating Techniques
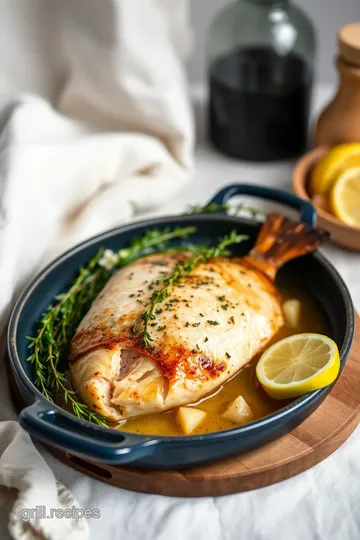
For an elegant presentation, serve each piece of yellowtail on individual plates with vegetables arranged artistically around it. Consider stacking or layering elements for added height.
Garnish Ideas
Fresh herbs like parsley or additional sprigs of thyme can add vibrant color and freshness to your plated dish. A drizzle of extra virgin olive oil provides a glossy finish that appeals visually.
Serving Suggestions
Pairing this dish with fluffy white rice or quinoa adds both nutrition and contrast on the plate. A side of roasted seasonal vegetables offers color diversity while enhancing flavor profiles.
Visual Appeal Tips
Utilize contrasting colors in your ingredients—such as vibrant green peppers against golden-yellow fish—to create an eye-catching plate that invites diners to dig in immediately.
Storage & Make-Ahead
Storage Guidelines
If you have leftovers, store them in airtight containers within two hours after cooking to maintain freshness. Yellowtail can be refrigerated for up to three days safely.
Preservation Methods
For longer storage options, consider freezing cooked yellowtail pieces wrapped tightly in plastic wrap followed by aluminum foil or placed in freezer-safe bags; they will last up to three months frozen without quality loss.
Reheating Instructions
Reheat gently using the oven at 180°C (350°F) until warmed through; avoid microwaving as it might dry out the fish’s delicate texture.
Freshness Tips
When reheating leftovers, adding a splash of water or broth helps retain moisture and flavor during warming processes—keeping every bite deliciously succulent!
Creative Variations
Flavor Adaptations
Experiment with different spices such as smoked paprika or cumin for a unique twist! Citrus zest adds brightness while infusing mellow sweetness into each bite too!
Dietary Modifications
For gluten-free options, use certified gluten-free spices while ensuring any accompanying dishes align with dietary needs—like substituting rice with cauliflower rice!
Seasonal Twists
Incorporate seasonal vegetables like asparagus in springtime or hearty squash during fall into your recipe’s vegetable layer—it keeps things exciting year-round!
Regional Variations
Explore global cuisine by incorporating Asian-inspired sauces such as teriyaki glaze instead of traditional butter mixtures—they transform this classic meal into something exotic yet familiar!
Expert FAQ Solutions
Common Concerns
Wondering how long you should bake? Stick closely to the suggested times but adjust based on thickness—you want flaky perfection every time!
Expert Answers
Unsure if it's done? Test by flaking apart gently with a fork; if it separates easily without resistance—that's success achieved right there!
Troubleshooting Guide
If dry outcomes occur occasionally despite following instructions precisely—consider checking oven calibration settings as sometimes inaccuracies arise unexpectedly affecting cook times significantly!
Success Tips
Don’t rush removing from heat once finished baking; allow resting after broiling allows flavors settling harmoniously together enhancing overall taste experience further still!
Complete Nutrition Guide
Detailed Breakdown
A single serving offers approximately 200 calories , providing high-quality protein along with essential omega-3 fatty acids critical for heart health—all contributing positively towards balanced diets overall!
Health Benefits
Rich Omega-3s derived contribute beneficial fats leading improved cardiovascular function alongside supporting brain health effectively—a delicious choice indeed!
Dietary Information
Each serving contains roughly 24 grams protein making this perfect post-workout meal option helping muscle recovery efficiently while being low-carb friendly too!
Portion Guidance
Aim servings between 100-150 grams per person depending upon appetite levels ensuring satisfaction without overwhelming eating habits promoting moderation across meals enjoyed regularly!

Oven-Baked Yellowtail with Garlic & Thyme Card

⚖️ Ingredients:
- 6 pieces of yellowtail
- 5 cloves garlic, thinly sliced
- 5 cloves garlic, minced
- 4 tsp fish spice (recommended: Robertson
- s spice for fish)
- 4 tsp lemon pepper
- Salt, to taste
- 1 onion, sliced
- 1 green pepper, sliced
- 100 grams butter (divided into two portions: 40 grams melted for brushing and 60 grams melted with minced garlic)
- Fresh thyme (6 sprigs)
🥄 Instructions:
- Step 1: Preheat your oven to 220°C (428°F).
- Step 2: Line an oven pan with tinfoil for easy cleanup.
- Step 3: Brush the tinfoil with 40 grams of melted butter and scatter the sliced garlic over it.
- Step 4: In a small bowl, mix together the fish spices and lemon pepper.
- Step 5: Season the skin side of each piece of yellowtail with half of the spice mixture before placing them skin-side down in the prepared oven pan.
- Step 6: elt the remaining 60 grams of butter, then combine it with the minced garlic. Brush this mixture generously over each piece of seasoned fish.
- Step 7: prinkle any remaining spices on top of the fish.
- Step 8: ayer the onion slices on top of each piece of fish followed by slices of green pepper and finish by placing fresh thyme sprigs on top.
- Step 9: over everything securely with another layer of tinfoil to keep moisture in during cooking.
- Step 10: lace in preheated oven and bake for approximately 30 minutes.
- Step 11: fter baking, remove from oven and turn on grill mode only (broiler setting).
- Step 12: arefully remove the top layer of tinfoil from your dish and return it to the oven under broiler heat for an additional 7 minutes or until lightly browned.
Previous Recipe: Roast Chicken Crown with Roasted Vegetables
Next Recipe: Grilled Corn Salad: Quick & Flavorful Dish
